While COVID recently put an end to our planned trip to the Big Red Bash, the silver lining was that the looming event gave us the prod we needed to finish our build of the Everest. In the final stage of the build, we added a snorkel, long range tank (which necessitated relocating the battery), and under vehicle armour.
I’d had the Smartbar Under Vehicle Armour for some time before installing it, but held off because one of the key mounting points for the armour was being used by the custom plate that had been installed for our second battery.
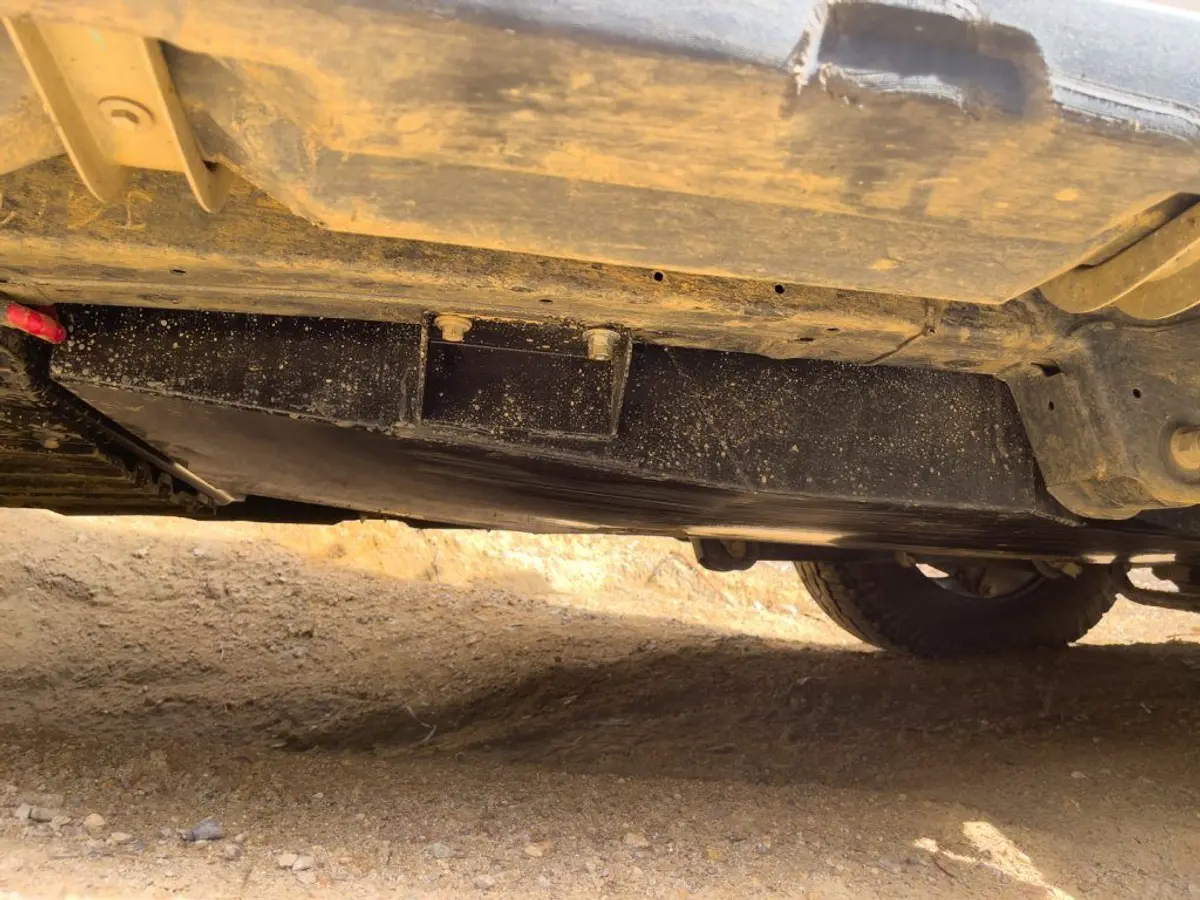
With the original bash plates, fuel tank, and custom battery plate. (Yes I needed to weed the driveway!)
I chose to use the Smartbar Under Vehicle Armour because it is lightweight but strong, both things that were important to me in keeping the weight down on the Everest (more on that later).
The challenge that immediately presented itself with the planned upgrades was that the second battery was using space under the vehicle that the long range tank would need. This necessitated the removal of the plate and relocation of the battery somewhere else.
Given this, the first part of the update was getting the battery relocated and electrical work done, followed by the long range tank install, and then the under vehicle armour.
With the lack of space under the bonnet in the Ford Everest (and the fact that Lithium batteries can’t stay in hot areas like an engine bay), the only place left to move the battery to was the rear of the vehicle. This took me back to the original plan I had of putting a removable battery box in behind the second row seats.
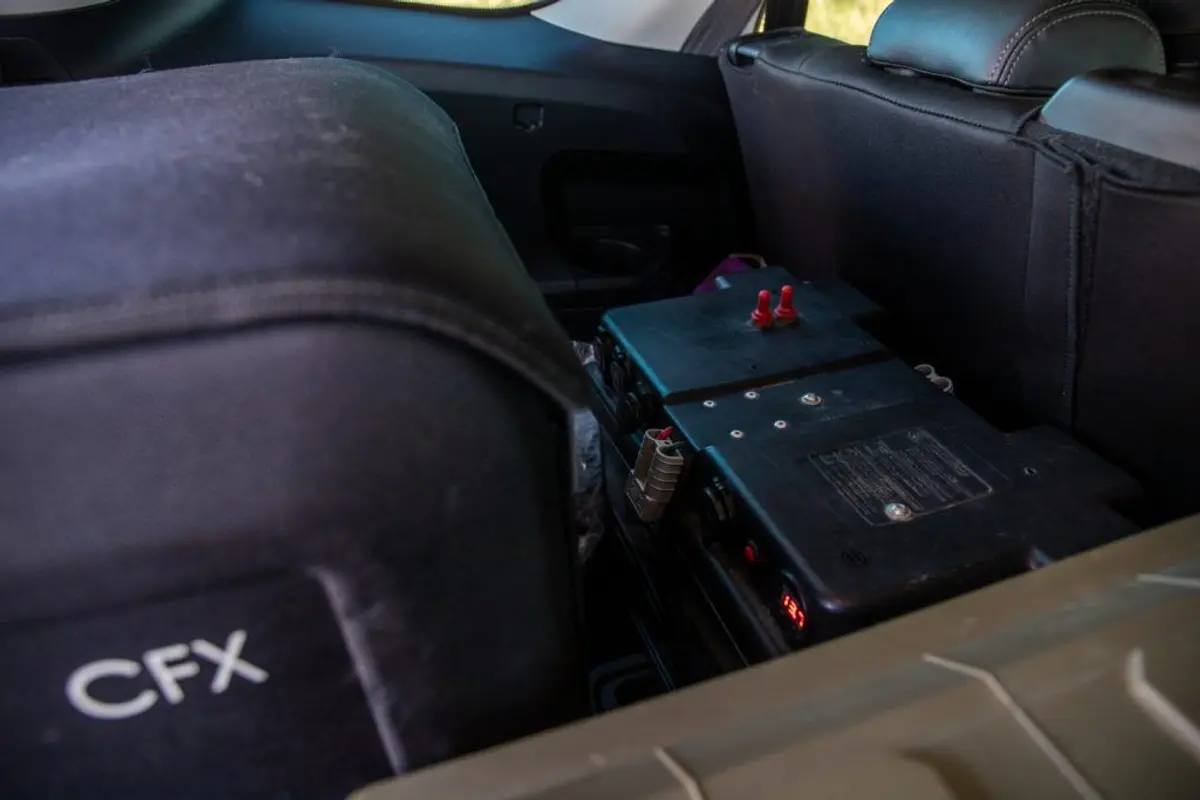
The battery was fitted into a battery box and mounted behind the second row seats, in line with the fridge. While screwed down, it can be easily removed if I need.
It needed to be fixed into the floor, but also able to be removed easily. With the appropriate grade Anderson connectors, I could unplug and remove the box if I needed the space to hold boxes or similar for events. It seemed like the most practical solution, so we went with it. Luckily the box could also hold the Bluetooth shunt, allowing me to track battery health via my smartphone.
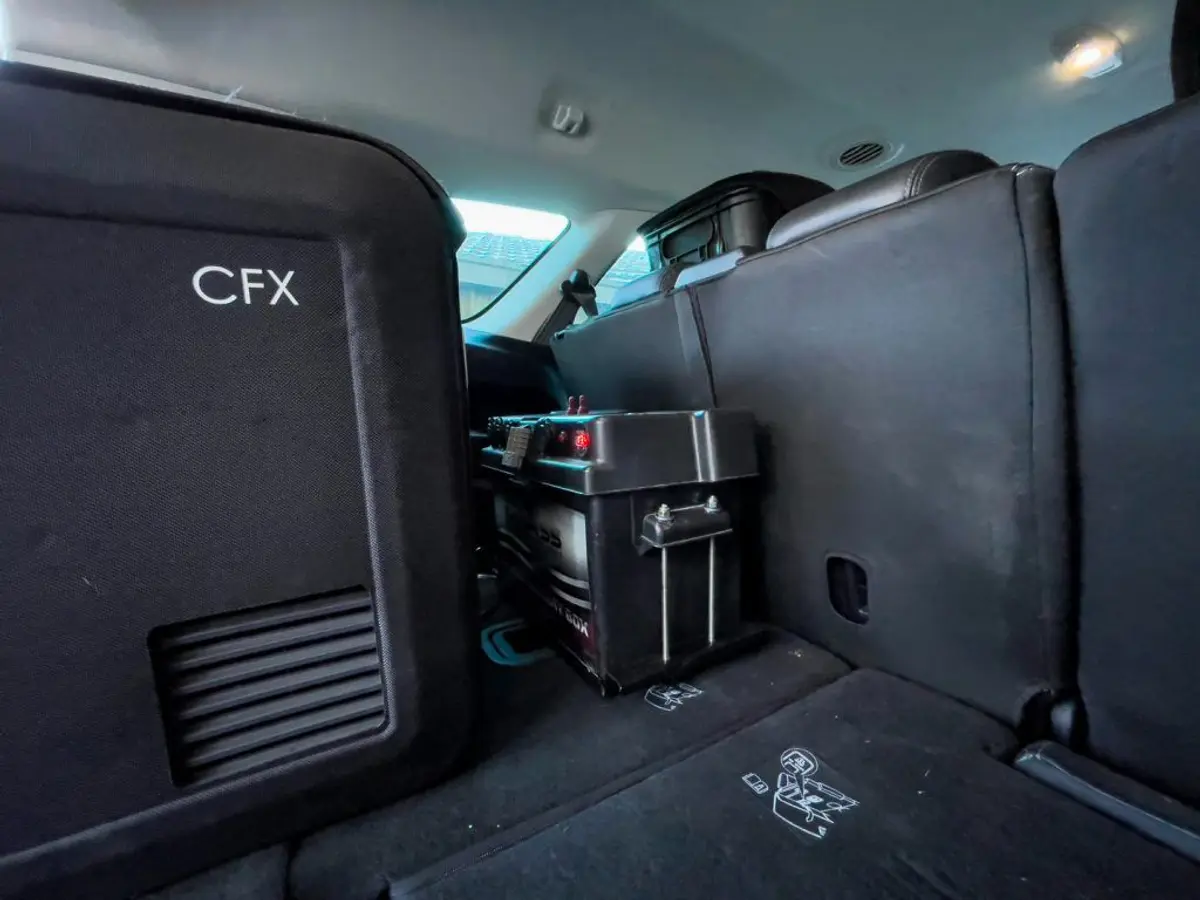
Another shot of the battery box
In the end, the battery box was installed in behind the Dometic Fridge Setup, because that was kind of dead space anyway. This meant no real loss of space in the cargo area.
Once the battery system was sorted (the 40A charger sits under the second row seats, with the inverter under the front passenger seat, and the cel-fi Go under the driver seat), the standard tank was replaced with a Brown Davis Long Range Tank (125L, with 120L useable). We chose the Brown Davis Tank because it claimed it didn’t reduce underbody clearance and it was baffled which would avoid fuel slosh. The other option would have been the ARB Frontier plastic long range tank, and we will give that a go on the Raptor shortly as a bit of a comparison.
In reality, clearance has been reduced in some areas as the tank fills out some of the space under the vehicle, although it doesn’t drop lower than the lowest points of the vehicle
As you can see, it does sit a bit lower at the front than it did before, although the tapering works well with the Smartbar Under Vehicle Armour which sits a bit lower than the lip, at least preventing the tank from catching on anything.
The other great thing about the Brown Davis tank was it could use the original fuel sender. I expected the fuel gauge to now stay at full until 80L were left in the tank, but I’ve found that so far the fuel gauge moves akin with the usage of the 120L which was a nice surprise.
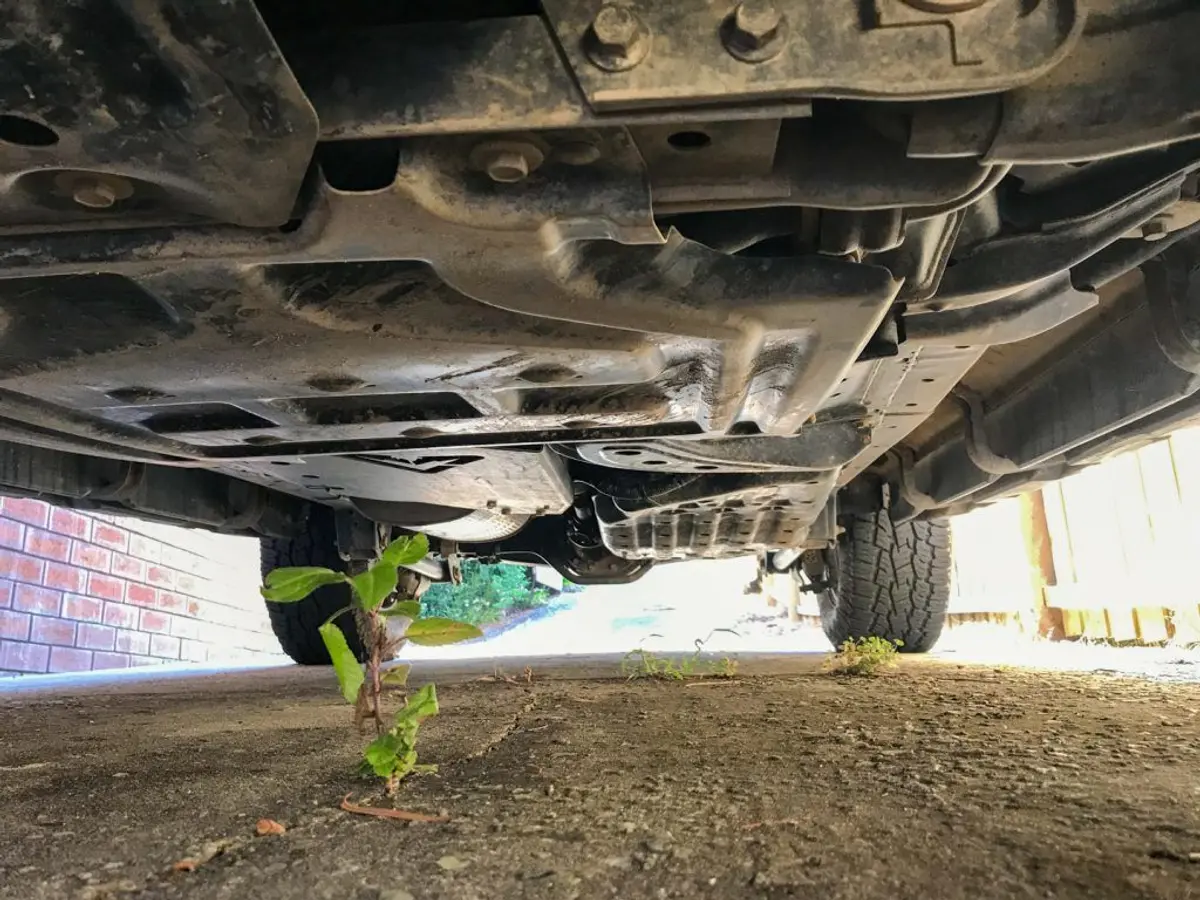
With the install of the long range tank complete, it was time to install the under vehicle armour. The kit (made by Smartbar) consists of 3 separate panels, plus mounts and a steel cross member for strength, which sits at the back of the second panel.
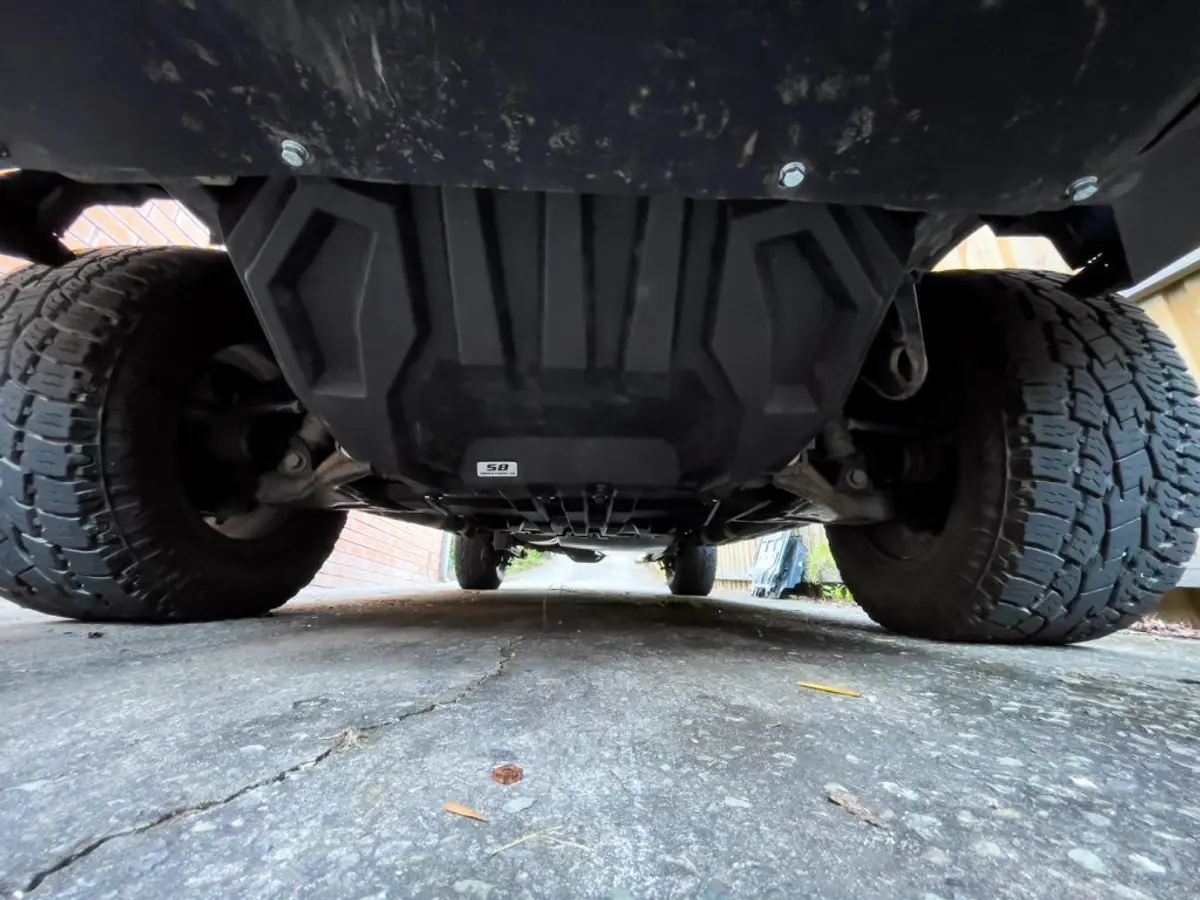
From the front
I had tried installing the armour previously, but found that I couldn’t install the cross member without modifications to the battery plate under the vehicle. With the battery and steel plate now gone, this wasn’t a problem and the under vehicle protection was installed easily. The only downside to the install was that the rear most armour plate would no longer fit the vehicle given the extra space the long range fuel tank now took up.
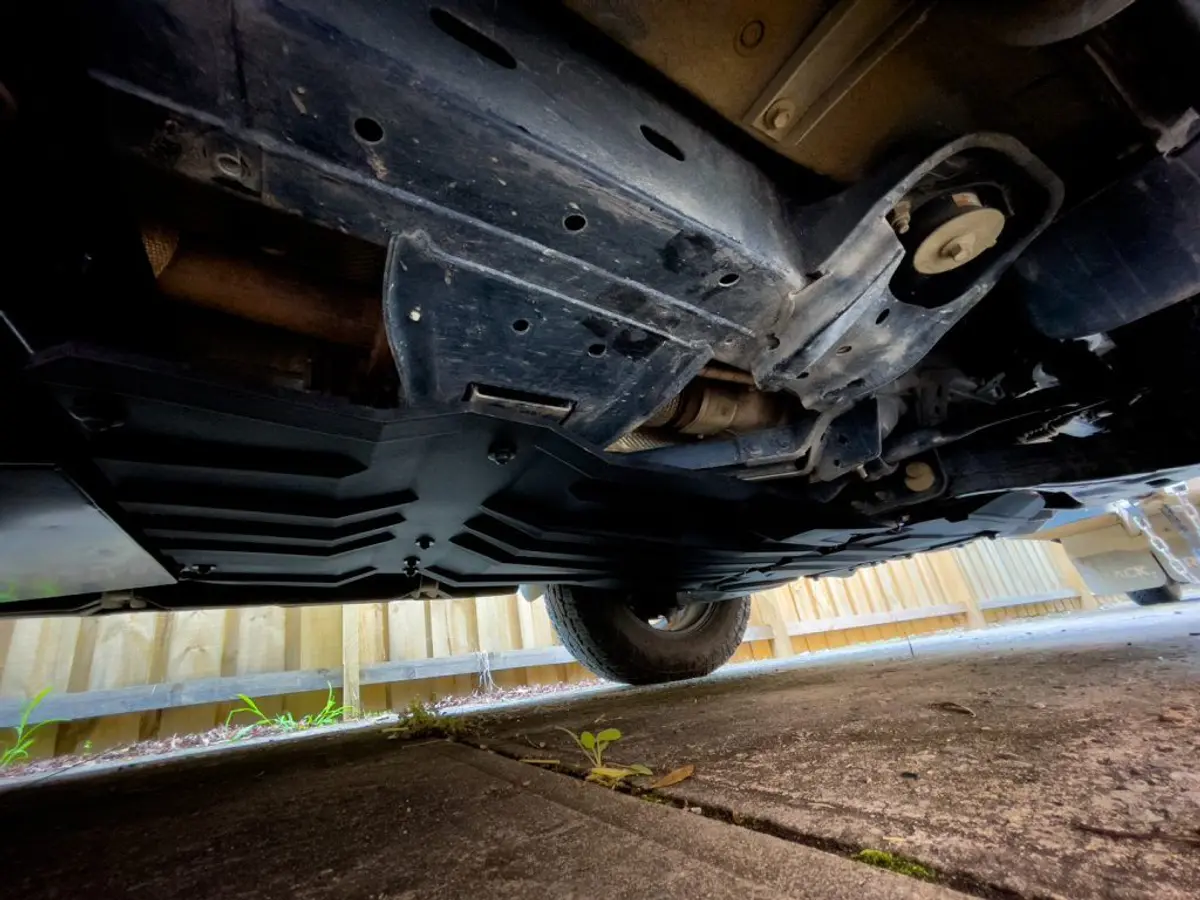
Another view of the UVA from underneath, which fits nicely with the Brown Davis Long Range Tank.
Having looked further into the Brown Davis Tank, they consider it strong enough in build to not require any further protection. The good news is that the front of the tank sits slightly higher than the under vehicle armour and then angles smoothly rearwards, which will help prevent the vehicle getting hung up if I run out of clearance.
Finally, the snorkel went on. For simplicity I went with the Safari V-Spec snorkel – a tried and true option, which seals brilliantly and looks good too.
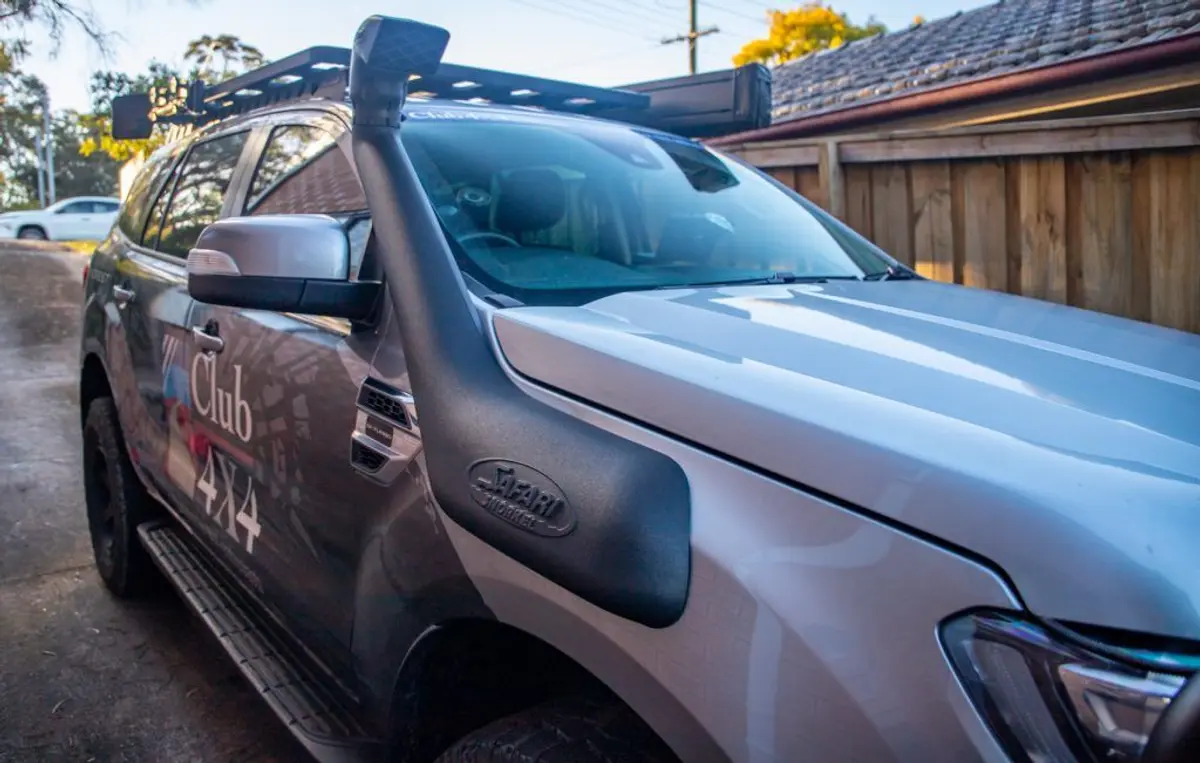
The snorkel increases noise with the window down, although the change is negligible with the window up. Most importantly, the engine feels like it breathes so much better!
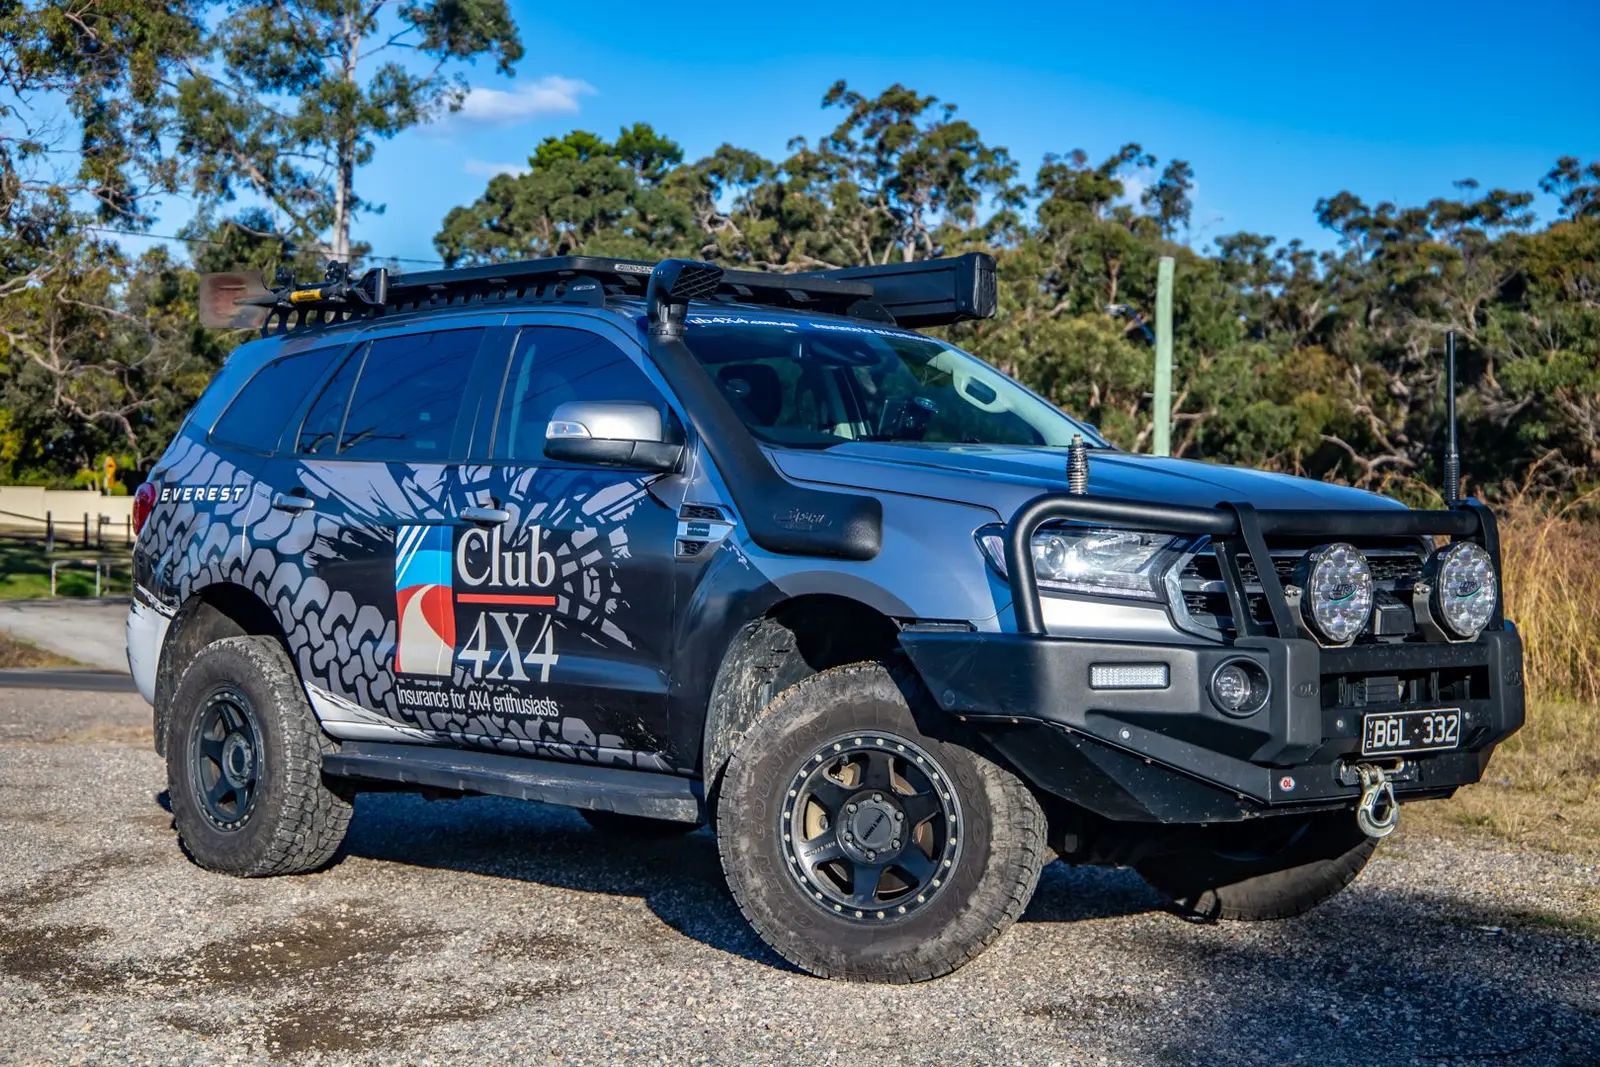
With these modifications, all work we intended to do to the Everest (other than minor tweaks in load carrying) is complete. The build is done and I’m confident that we’ve turned it into a very capable off-road tourer.
The only thing remaining is to talk weight. Unfortunately the Everest currently doesn’t have a GVM upgrade kit available, which means we are limited to the 3100KG GVM. With it weighing about 2400KG (kerb weight) from the factory with tow bar , we had 700KG to play with.
For a Wagon, this is actually a lot. If it is compared to a 200 series Landcruiser GXL, they have a 610KG Payload.
Even with 700Kg of payload, it has been largely eaten up with the mods we’ve done which are pretty common for those using their fourby for how it was intended:
- Opposite Lock Bullbar
- Bush ranger Revo Winch with Synthetic rope
- Ultravision Nitro 180 Driving Lights
- Bigger tyres – Toyo Open Country ATII Xtreme (285/65/17) on Method Con 6 Black Wheels (within legal increase limits)
- 2” Tough Dog adjustable suspension upgrade – 0-300KG in rear
- 100AH Revolution Lithium Battery
- Redarc 1240D BCDC Charger
- Redarc 1000W Invertor
- Cel-Fi Go! Mobile repeater
- Oricom Dual receive CB Radio
- Safari Snorkel
- Brown Davis Long Range Tank (125L)
- Smartbar Under Vehicle Armour
- Dometic CFX-3 45L Fridge
- Ford Electric Brake Controller
- Tow bar
- Rhino-Rack Backbone Roof Platform
- Rhino-Rack Batwing Awning
- Bushranger Diggar Shovel
- 1x Pair Tred GT recovery Tracks
- Scangauge II
- Hema Hx-1
- Bushranger Sand Flag
So what’s the current weight?
I was keen to find out, so once I filled up the larger tank, I took the vehicle over the weighbridge and found myself at just over 2800KG. This is likely due to weight of the fuel tank being somewhat offset by the previous steel plate, and the fact that I took out some of the gear I had sitting in the car (tools and recovery gear) to get a ‘base’ weight.
I really don’t want to add anything else, and will need to consider what goes in the vehicle when I tow our Tvan to make sure that I stay under GVM. Ideally another 150-200KG of payload would be perfect to give me comfort with how we use the Everest. The good news is that I suspect that with the growing acceptance and popularity of this vehicle it is only a matter of time before an upgrade becomes available.
We’ve now got over 50,000km on the clock, and I can hand on heart say that this is the most comfortable 4X4 I’ve ever driven (apart maybe from the Ranger Raptor), and I’ve found it surprisingly capable off-road, especially with the typical ‘off-road touring’ enhancements we’ve made.
Even at the current weight I can still manage 10-10.5L/100km if I’m sensible with the throttle, which means I can push nigh on 1000km on one tank!
Now its time to really get off the grid and explore – hope to catch you out there…
Aiden
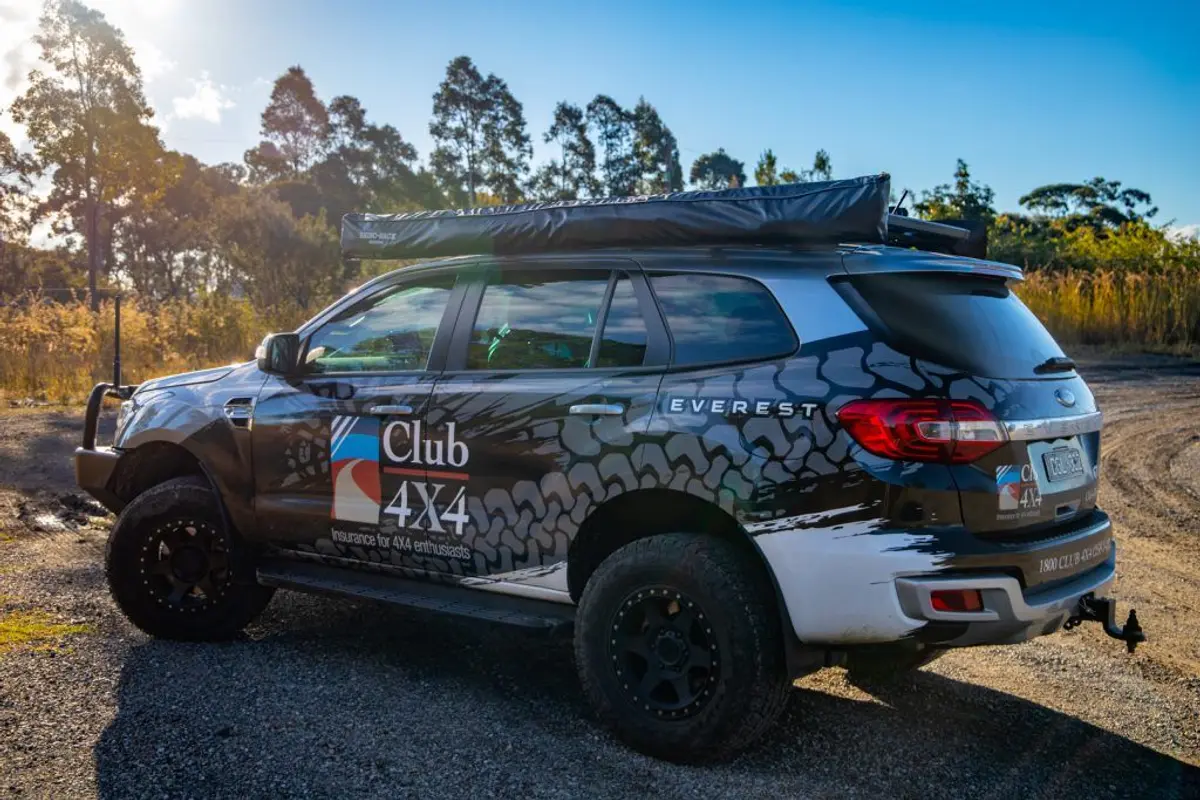
A capable tourer!