


Article from RV Daily.
If you have an older caravan that is lacking some outdoor 12 volt lighting, this LED Strip Light installation is a quick and easy solution you can do yourself.
If you’ve been following our recent articles, you have noticed I’ve been working on my in-law’s 2000 model Roadstar Little Ripper pop-top caravan. The goal has been to make it more liveable and give it a few modern conveniences. One of the accessories missing from the van was any exterior 12-volt lighting. It had a single 240-volt light near the rear door but that was pretty useless for free-camping or when cooking under the side awning. We had to come up with a solution and an LED strip light seems to be the simplest option.
Now, before I go on, it is important to consider a few things before doing this installation:
- You are going to have to run wiring for the light from your battery or fusebox if you have one. Given you cannot remove the walls and run new wires through the frame (unless you’re doing a full renovation) the options are going to be limited. You may have to run the wiring through some conduit attached to the wall. That’s what we did with our van.
- You will need to drill at least one hole for the wiring to pass through and positioning this hole may take some careful consideration. Always measure three times and only drill once. You don’t want to be repairing mistakes.
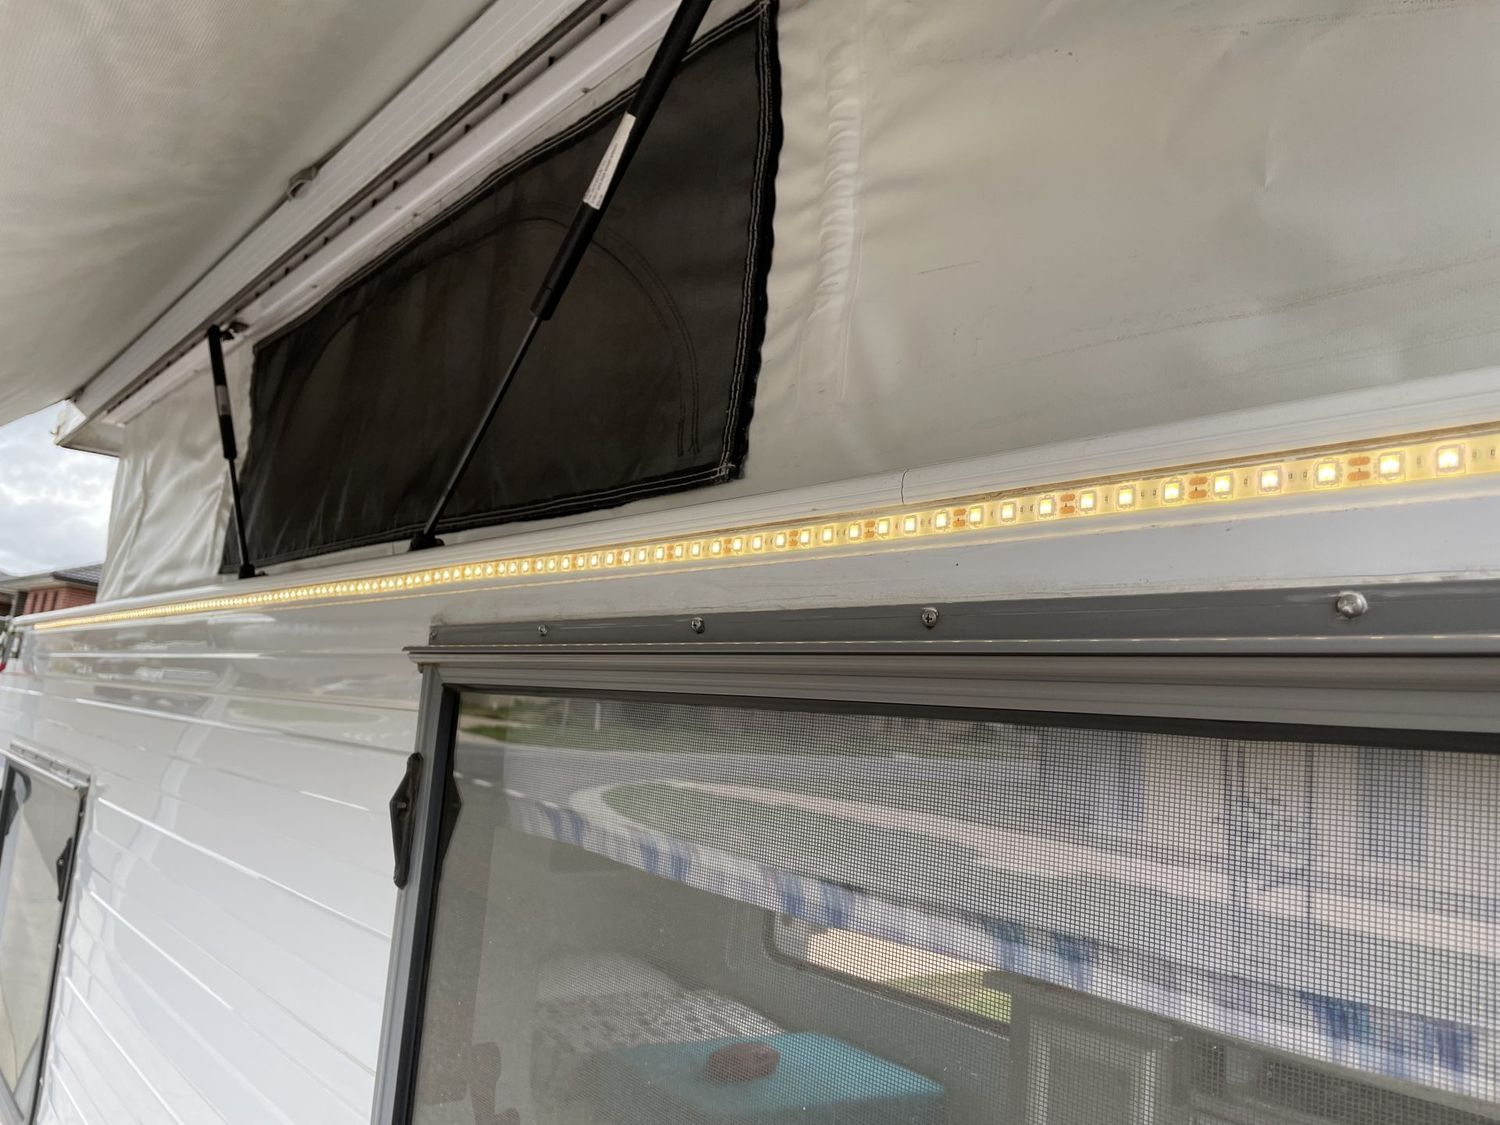
- When it comes to purchasing the strip lights, don’t skip on quality. The installation relies on adhesive tape to stick to the outside wall of the van. The quality of tape varies greatly. Always look for strip lights with 3M or similar quality backing tape.
- There are also different types of led strip lights avaiable. You can get plain white, off white that resebles older incandecent light output, amber light which is great for reducing the number of bugs hanging around your van, and there are multicoloured lights that can be almost any colour and can even flash in sequence so you can have your own party lights outside your van if you like. Given my in-laws are never likely to what to host a disco at their van, we opted for the plain off white lights.
With our Roadstar, we were lucky that the previous owner had already installed some flat conduit in the rear corner wall of the van for the solar controller wiring he had fitted. This aligned perfectly with the position of the strip light and it was here we routed the wiring to the battery through the wall. I drilled a single small hole through to the interior of the van that was just wide enough to fit the wire with a small outer sheath to offer some protection against the sharp edges of the hole. I filled this hole with silicone sealant to prevent any water ingress.
When it comes to wiring, the strip light will be supplied with a small coaxial plug. I wasn’t too convinced of how weatherproof these connections would be so I decided to cut off this plug, connect the wires directly and cover the connection in shrinkwrap, electrical tape, and conduit that was also sealed with silicon. It is probably overkill, and not the neatest correct entry, but it should prove weatherproof in the long run.
The strip lights come in lengths of around 5 meters. Unless you have a seriously long van, you will not need to use all of this. The strip lights can be cut to suit your desired length. Just make sure you cut them only at the position indicated otherwise you risk damaging the electronics.


I TOOK THE OPPORTUNITY TO INSTALL A PROPER FUSE BOX AT THE SAME TIME AS THE LED LIGHTS. THE REGULAR HOUSEHOLD POWER SWITCH MATCHES THE REST OF THE INTERIOR.
Mounting the strip light is a simple matter of cleaning the mounting surface thoroughly with methylated spirits to remove any road grime, grease, or old sealant. This will give the adhesive tape the best opportunity to bond properly with the surface.
To turn the light on and off, I installed a simple household switch and wired it into the power cable to the light. I drilled a hole in the side of the light switch and the conduit for the connecting wire to run and then screwed the switch to the wall against the conduit to conceal the wiring. It’s a simple solution that is very effective and looks good as well. If you want to get fancy, you can use a 12-volt dimmer switch but I couldn’t find one of these that looked aesthetically pleasing.
When connecting the strip light to the battery, you will want to ensure it is fused. This will require connection to a spare slot on your fuse board should you have one or you will need to use an inline fuse. These lights can draw up to 8-amps so a 10-amp fuse should suffice.


I MANAGED TO SOLDIER CONNECTIONS TO THE LEFTOVER LIGHT STRIP BUT IT WASN’T EASY. I HAD ENOUGH TO MAKE ANOTHER LIGHT AT THE REAR OF THE VAN OVER THE ENTRY.
If you have a small van like ours, you’ll likely have a significant length of light strip leftover and you may be wondering what to do with it. I used ours to make additional lighting above the rear door. You could also use it to make some lighting in the front boot if you have one. Whatever you decide to do with it, consider you will need to solder wiring to the leftover section of the light strip and I can tell you this is no easy task even if you are reasonably competent with the use of a soldering iron. The contacts are covered with a think, hard coating and the contacts themselves are very thin and will easily burn if you are not careful. It is possible but very difficult for us amateurs.
I was very happy with the end result especially when you consider that I only had to drill one hole through the wall of the van. Time will tell how long the adhesive tape on these lights lasts but I expect it will be easy to fix should it ever fail later down the track.
Save travels.